Zepeto Studio Motion Data Application Process

ZEPETO STUDIO
ZEPETO is a 3D content creation tool used to create virtual worlds and content on the ZEPETO platform operated by NAVER Z, giving creators the opportunity to monetize their work as digital creators.
How to install Zepeto Studio and set up the program
1. Install Zepeto on your phone and sign up.
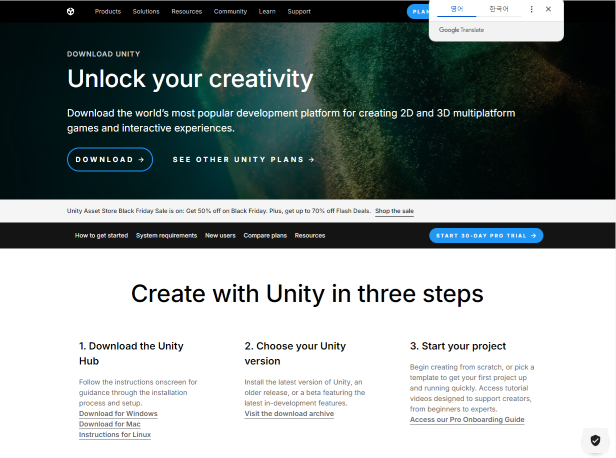
2. Download Unity Hub from the Unity Hub homepage. link to the homepage : https://unity.com/download
3. Download and install version 2022.3.34f1, the recommended Unity version for Geppetto. Link to the homepage : https://unity.com/releases/editor/archive

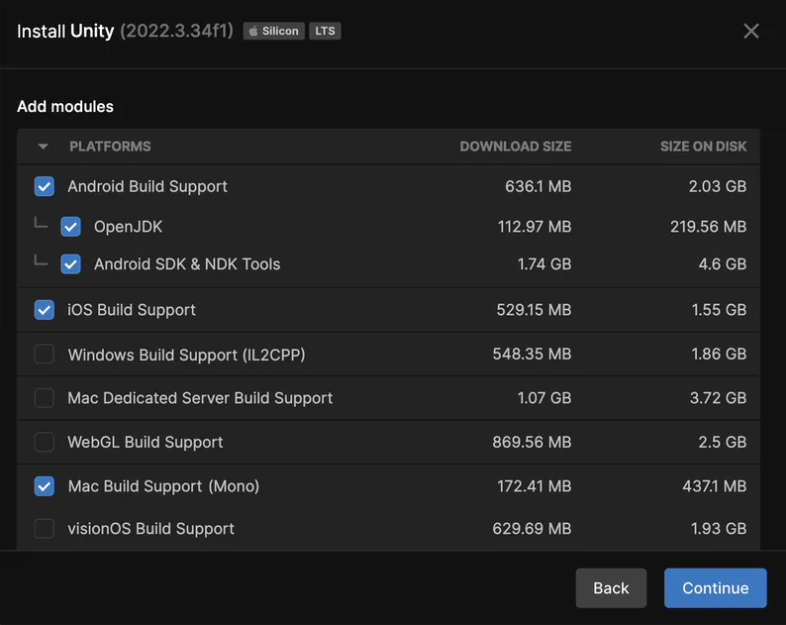
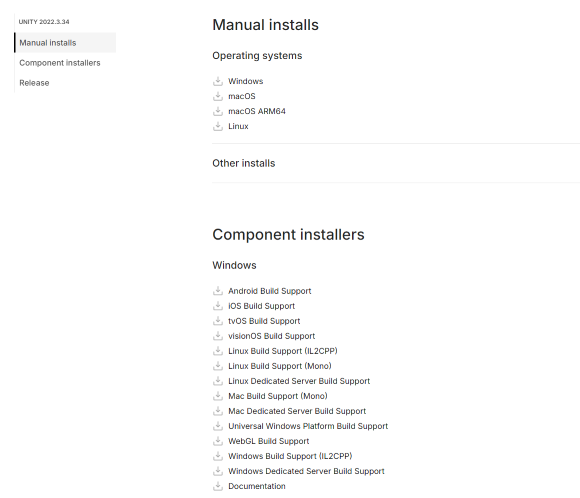
4. Select the required modules to install (on Windows)
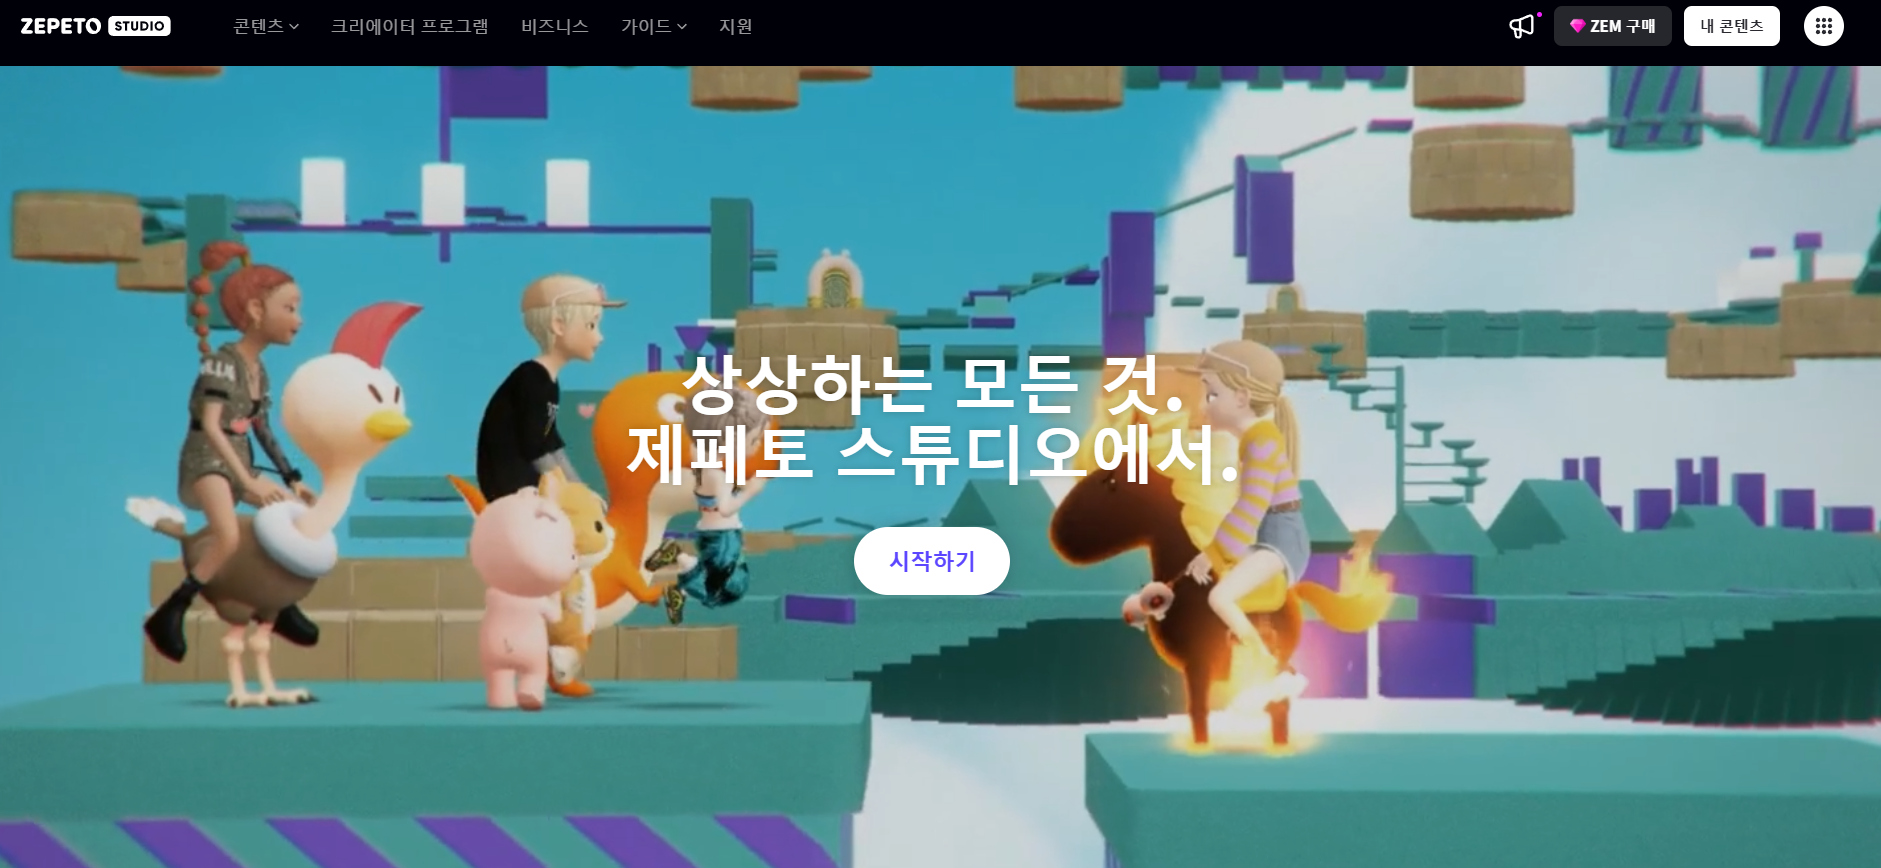
5. Visit the Geppetto Studio homepage. Link to the homepage : https://studio.zepeto.me/ko
6. In Zepeto Studio, click World Guide on the Guides tab above to enter it.
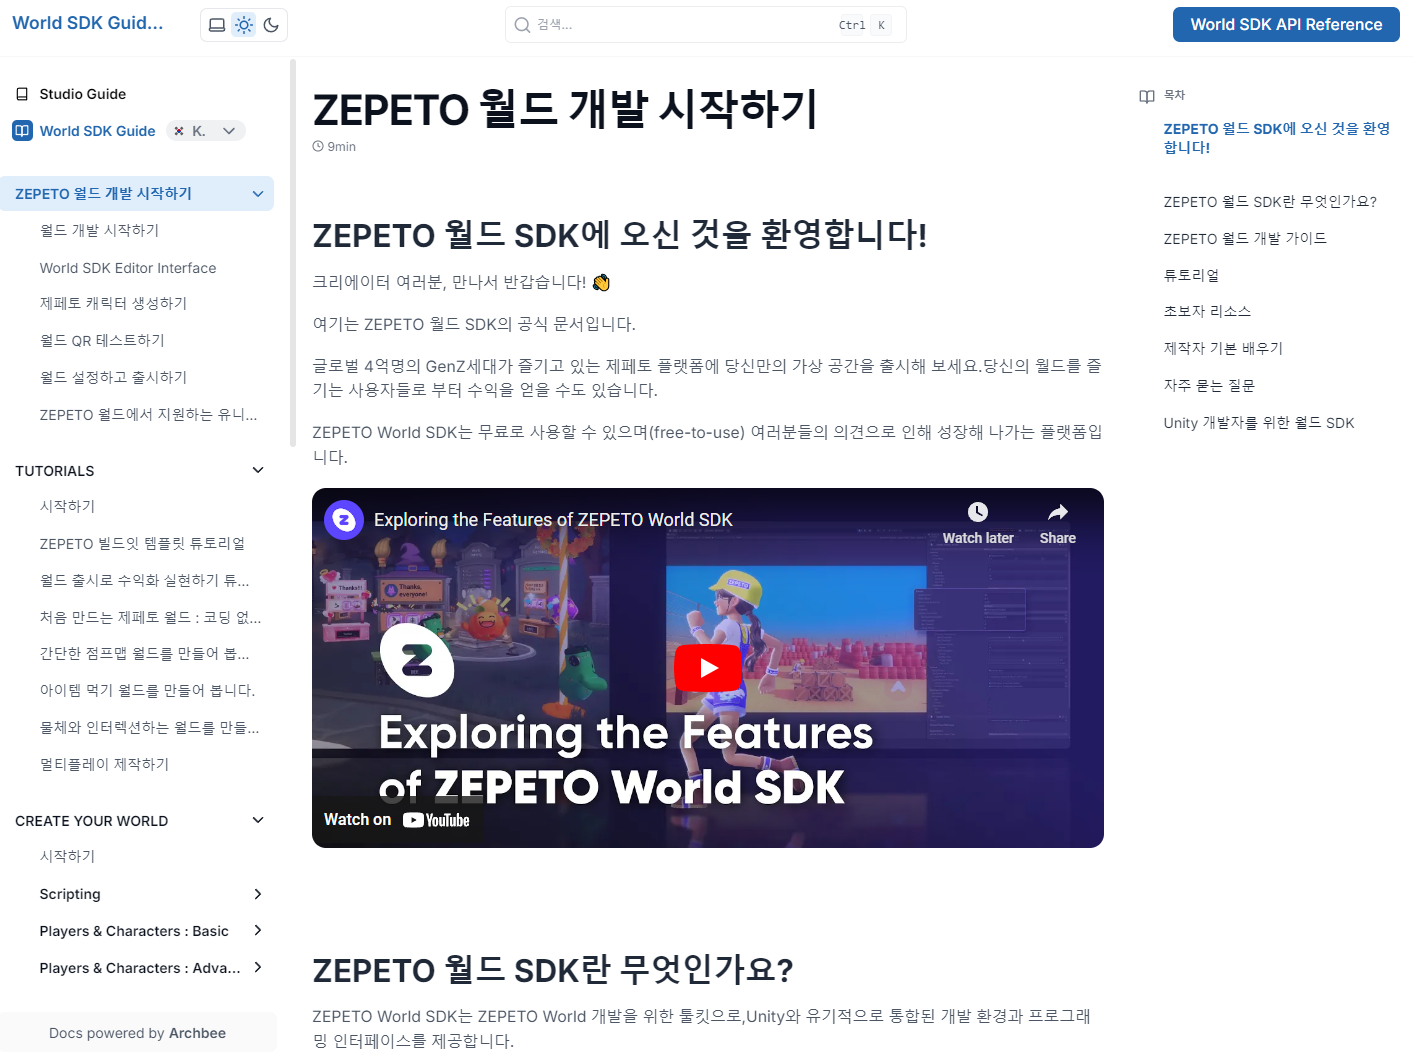
7. On the World Guide page, click the Getting Started with ZEPETO World Development tab on the left.
8. Scroll down to Step 3 of the ZEPETO World Development Guide and click Install the ZEPETO World Template in Unity.
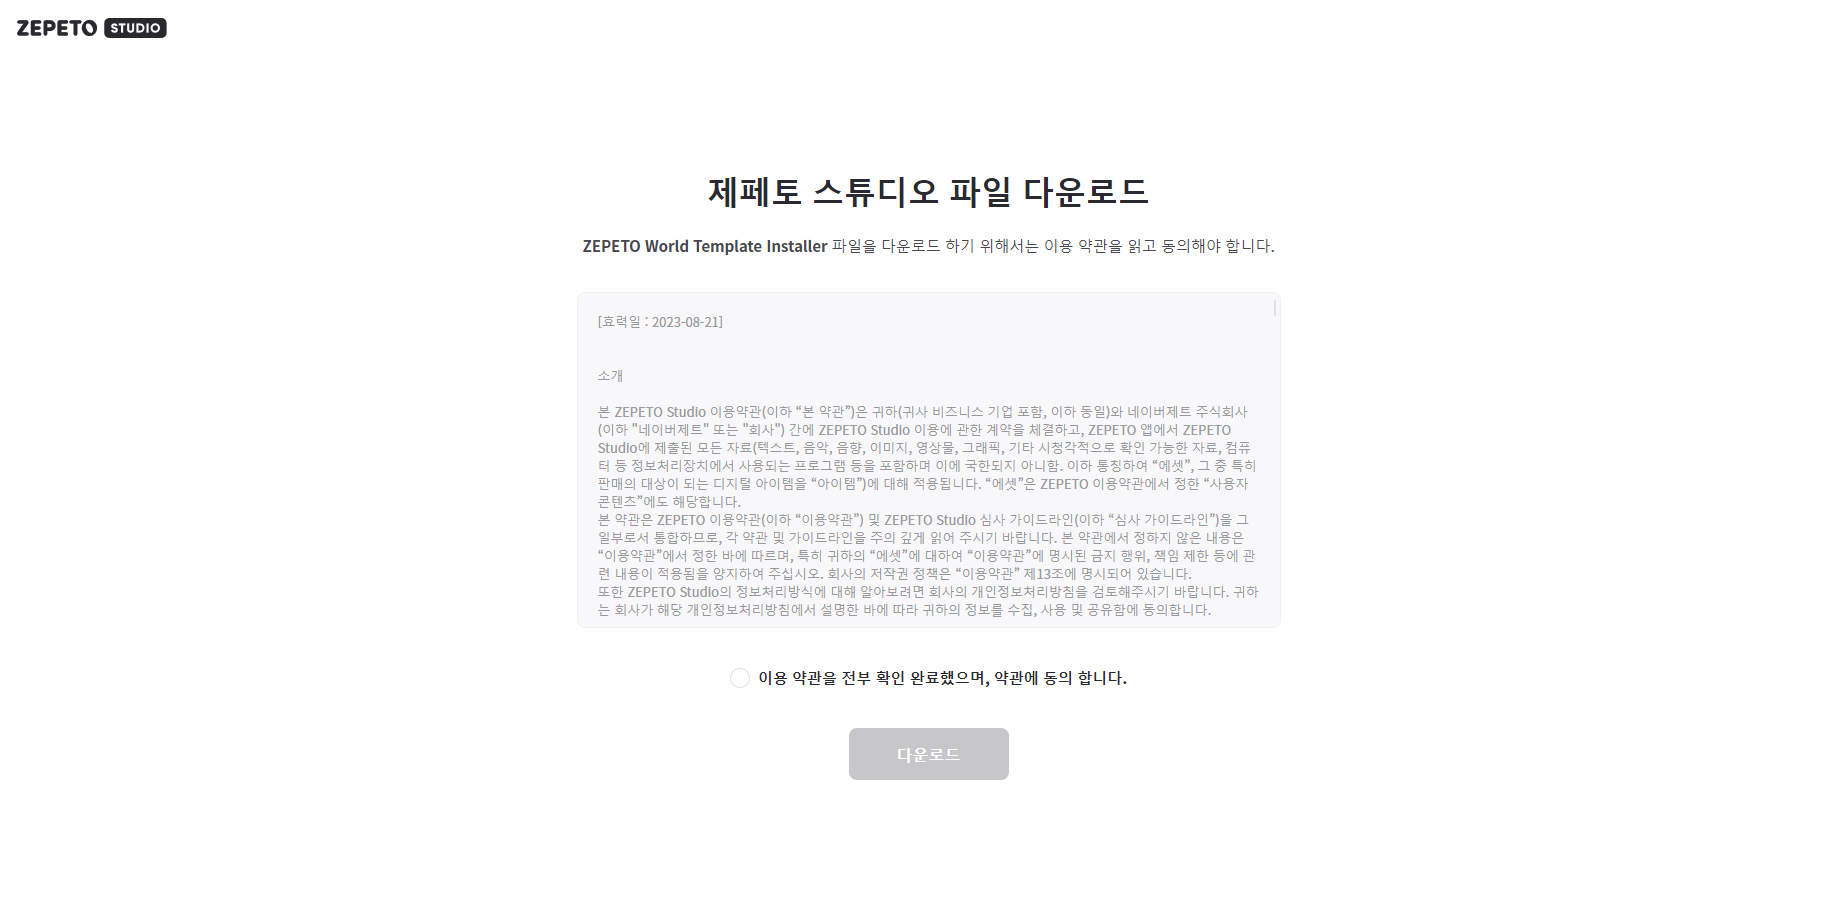
9. Download the Zepeto Studio file.
10. Open Unity Hub and tap New project.
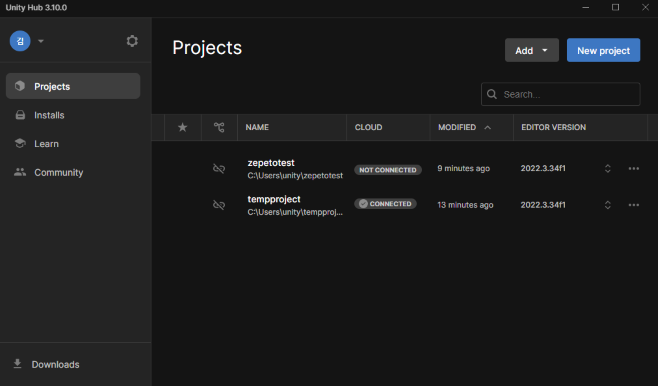
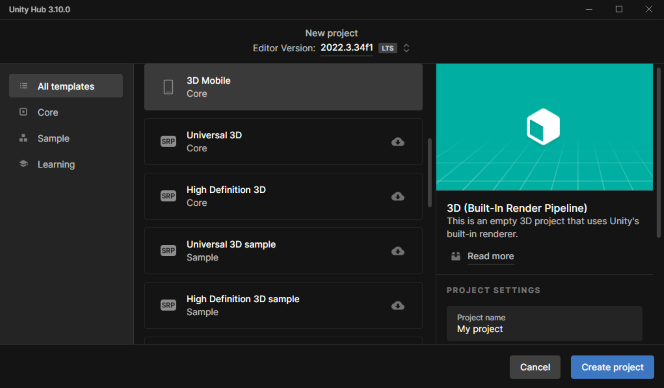
11. Make sure the Editor version above is 2022.3.34f1, select any of the templates, and click Create project.
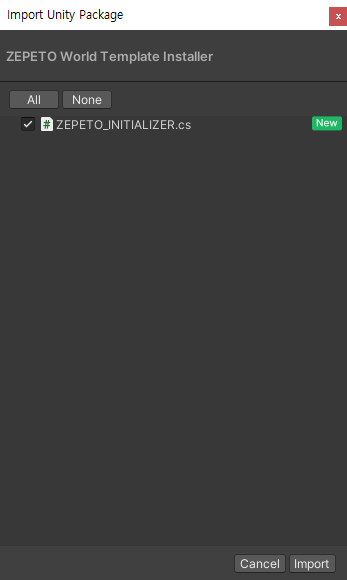
12. With your project open, double-click the Geppetto template you downloaded in 8 to import it.
13. When the import is complete, close the Project window and return to Unity Hub.

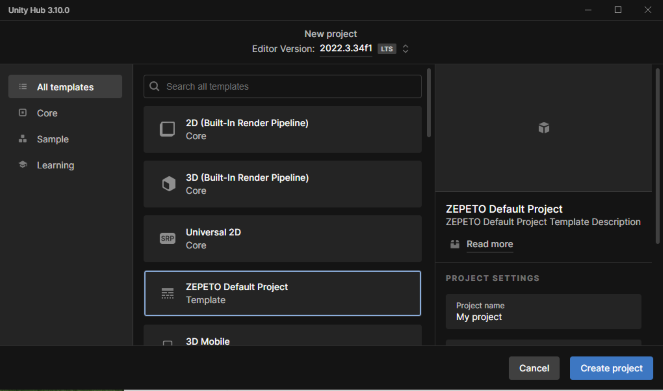
14. click New project, check the Editor version to make sure it is 2022.3.34f1, and check if the ZEPETO Default Project template exists.
15. Select the ZEPETO Default Project template and click Create project to finish installing ZEPETO Studio and setting up the program.
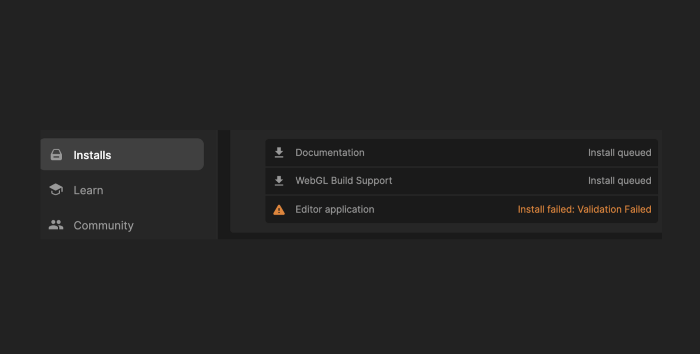
Common errors and solutions during installation
When you encounter a Unity version installation error (Install Failed: Validation Failed error), go through the following process
1. Run Unity Hub again as an administrator.
2. shut down your antivirus program and disable your firewall (set your firewall back up after installation)
3. Install the version manually.
- Enter the Unity version download archive homepage. link to the homepage : https://unity.com/releases/editor/archive
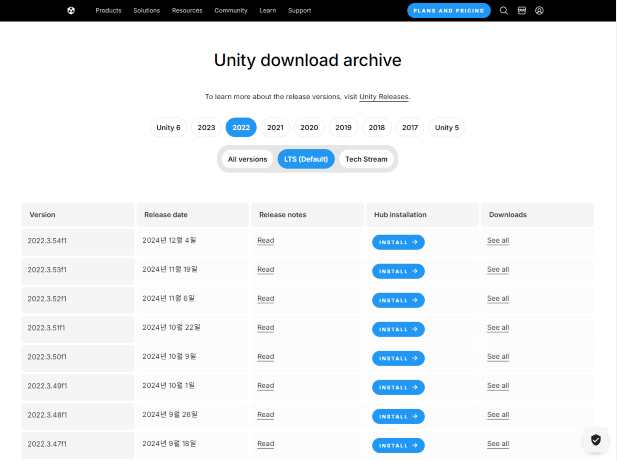
- Locate version 2022.3.34f1, find the See all button in Downloads, and click it.

- Click the Manual installs tab on the left, find the modules checked in #4 of the Zepeto Studio installation method and program settings, and download them manually.
- Run the manual program you downloaded.
4. Add or change the administrator account.
- Press the Windows key + R to launch the Run window.
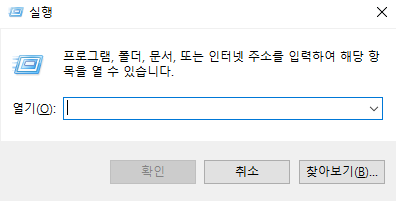
- In Open, search for netplwiz.exe to bring up the User Accounts screen.

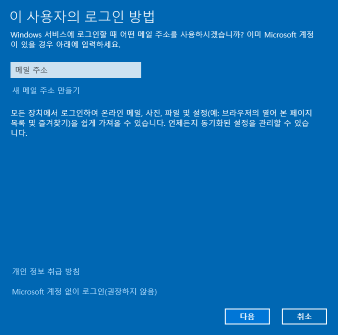
- Under User accounts, tap the Add button, and then tap the Sign in without a Microsoft account button to enter the Add user screen.
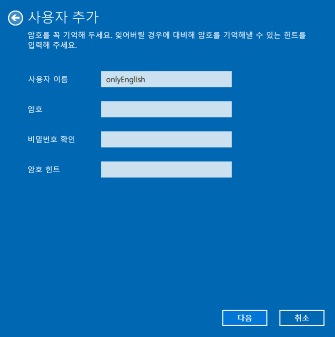
- Make sure to enter your username in English and press Next.
- Under User accounts, select the account you created and tap Properties.
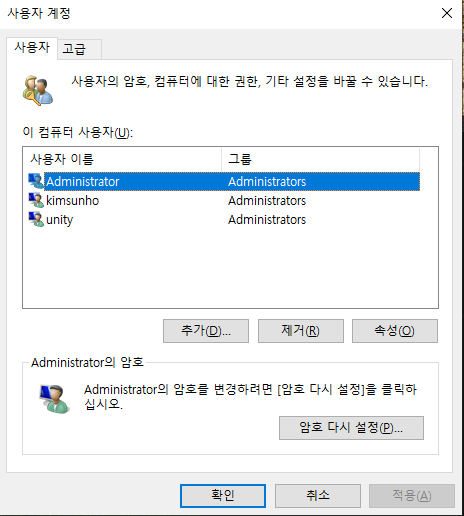
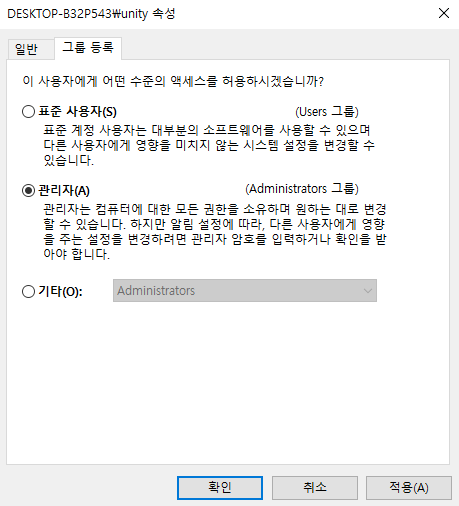
- Click the Group Enrollment tab, change to the administrators group, and hit Apply and OK.
How to Import Motion Data
Drag And Drop Method
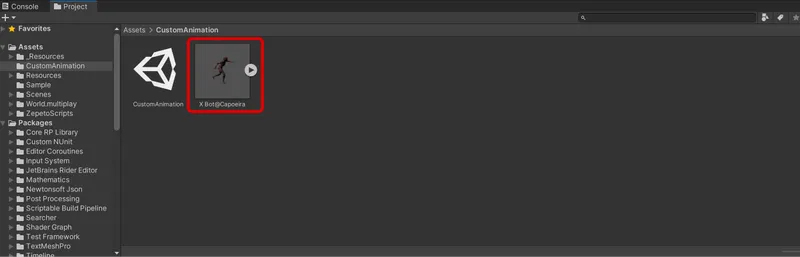
Drag the Motion Data fbx file to Assets in the Project window using the mouse to import it.
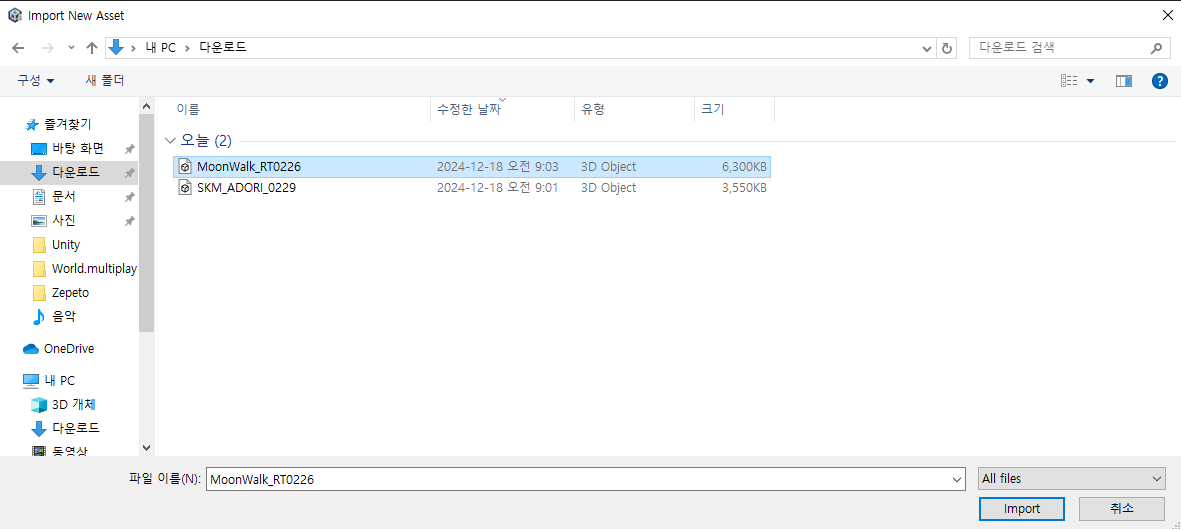
How to use Import New Asset
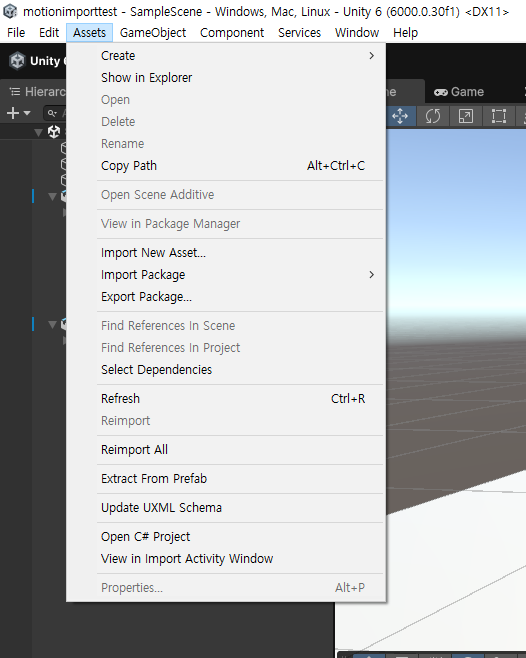
1. Click Import New Asset from the Assets tab located at the top of Unity.
2. Select the FBX file you want to use and click the Import button to import it.
How to animate
To animate a character
1. Import the animation you want to use.
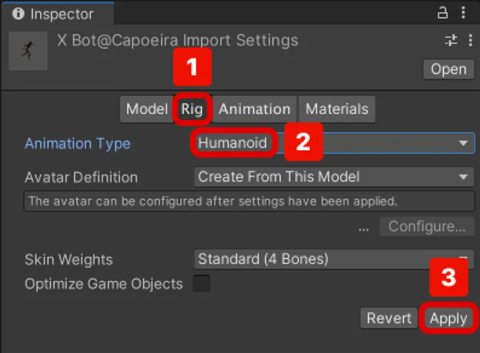
2. In the Rig tab of the Inspector on the right, change the Animation Type to Humanoid and click the Apply button.
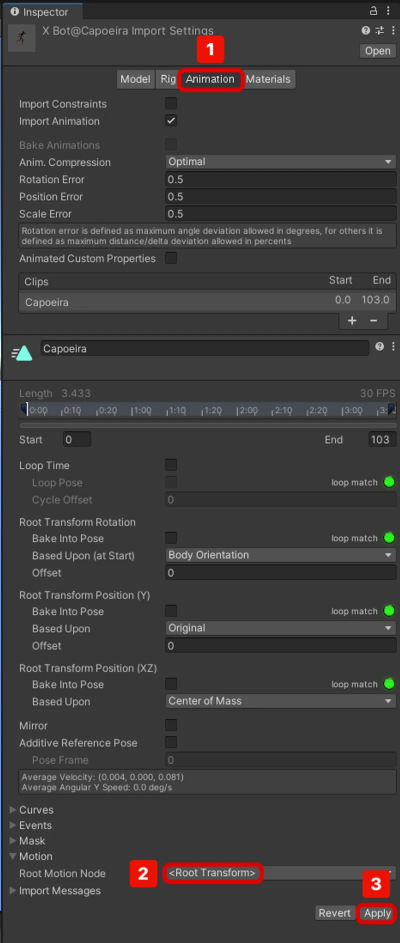
3. Go to the Animation tab of the Inspector and under Motion, change the Root motion Node to select the Root Transform and press the Apply button.
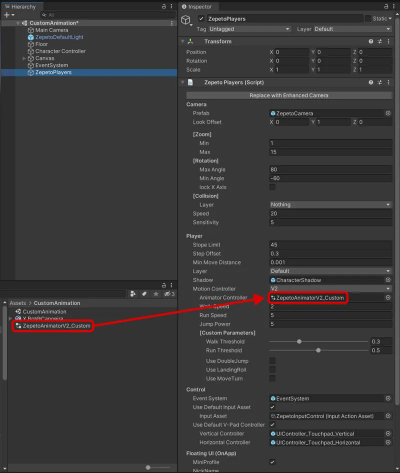
4. In the ZepetoPlayers Component Inspector, duplicate the Animator's object associated with the animation variables.
File path: Package/zepeto.character.controller/Runtime/_Resources/AnimatorController/ZepetoAnimatorV2.controller
5. Move the duplicated Animator to the folder where you want to use it, and rename it to ZepetoAnimatorV2_Custom (feel free to rename it however you like).
6. Click the + button in the Hierarchy window to create Zepeto > ZepetoPlayers, and in the Inspector of ZepetoPlayers, drag ZepetoAnimationV2_Custom into the Animation Controller field.
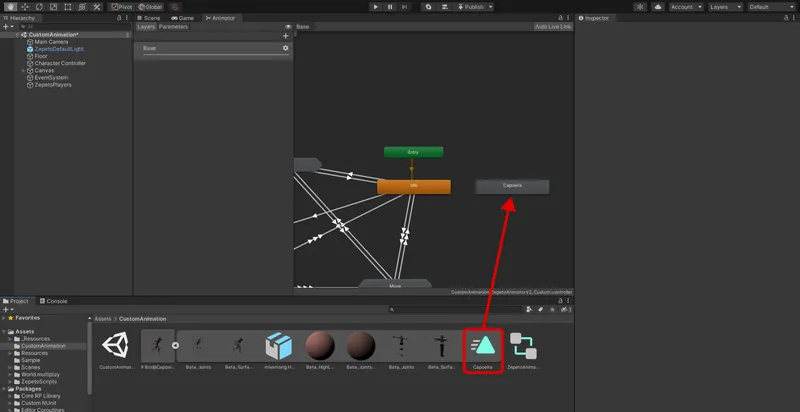
7. Double-click ZepetoAnimatorV2_Custom to open the Animator.
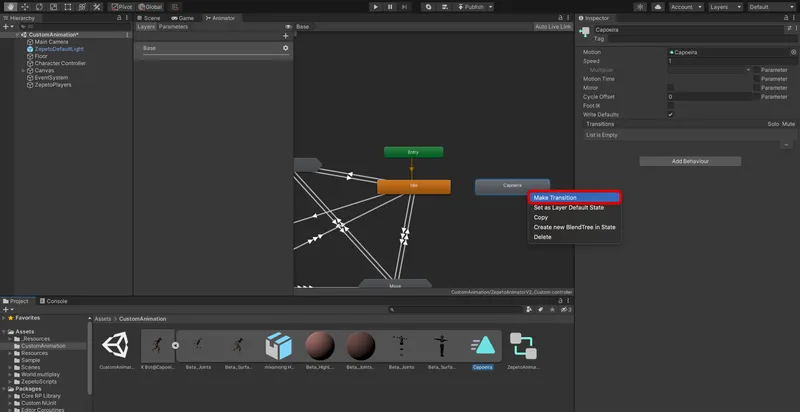
- Drag the imported animation to create an Animation State.
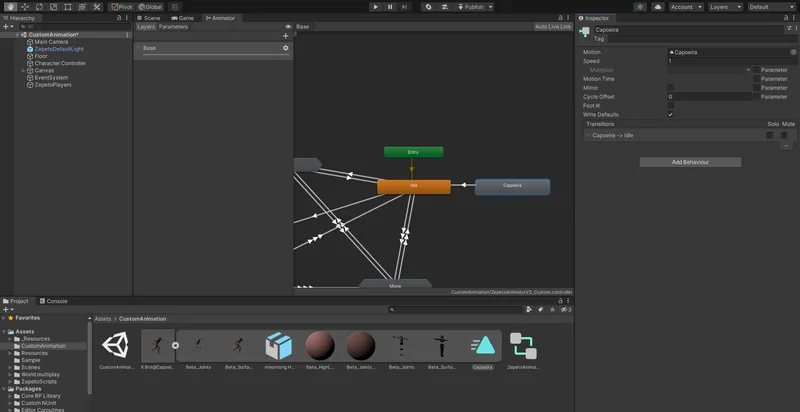
- Right-click the State you created, click Make Transition, and drag it to Idle.
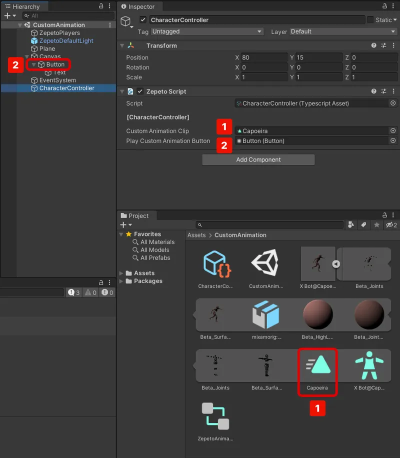
8. Press the + button in the Hierarchy to select and create an Empty Object and rename it CharacterController.
9. On the Project tab, create Zepeto > TypeScript and rename it to CharacterController.
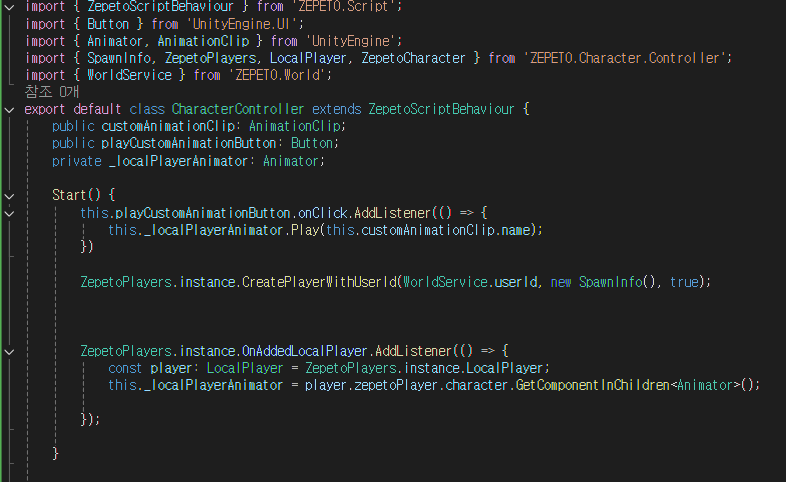
10. Write an animation script in TypeScript. (The script written here is a sample script, and you can add your own conditions to it).
11. In the Hierarchy window, add a Zepeto Script to the CharacterController and drag the CharacterController Typescript into it.